Tutorial: your first model
This walks you from nothing to a trained model with a score, in the console at sight.raku.so. It uses a sample set of photos we have put together, so there is nothing to prepare and no code to write.
By the end you will have:
- an account and a project,
- a model that finds hard hats, trained on 100 photos,
- its score, measured on photos it never saw,
- a second model, trained on photos you labelled yourself,
- and a rule that turns what the model sees into a verdict: pass, fail or needs a person.
What a free account can do
A free account can label photos, train models and see how each one scores. It can try its models in the Playground or call them from its own software, up to 1,000 photos a month, and write up to 5 basic rules per project. A free account is for one person; adding your team, reading text in photos and a machine of your own are part of the paid plans.
1. Create your account
Go to sight.raku.so/sign-up. Use your work email, or continue with Google, GitHub or Microsoft.
2. Create a project
You land on Projects. Choose + New project, name it Hard hats, and
choose Create project. A project holds its own photos, labels, models and
keys.
3. Download the sample set
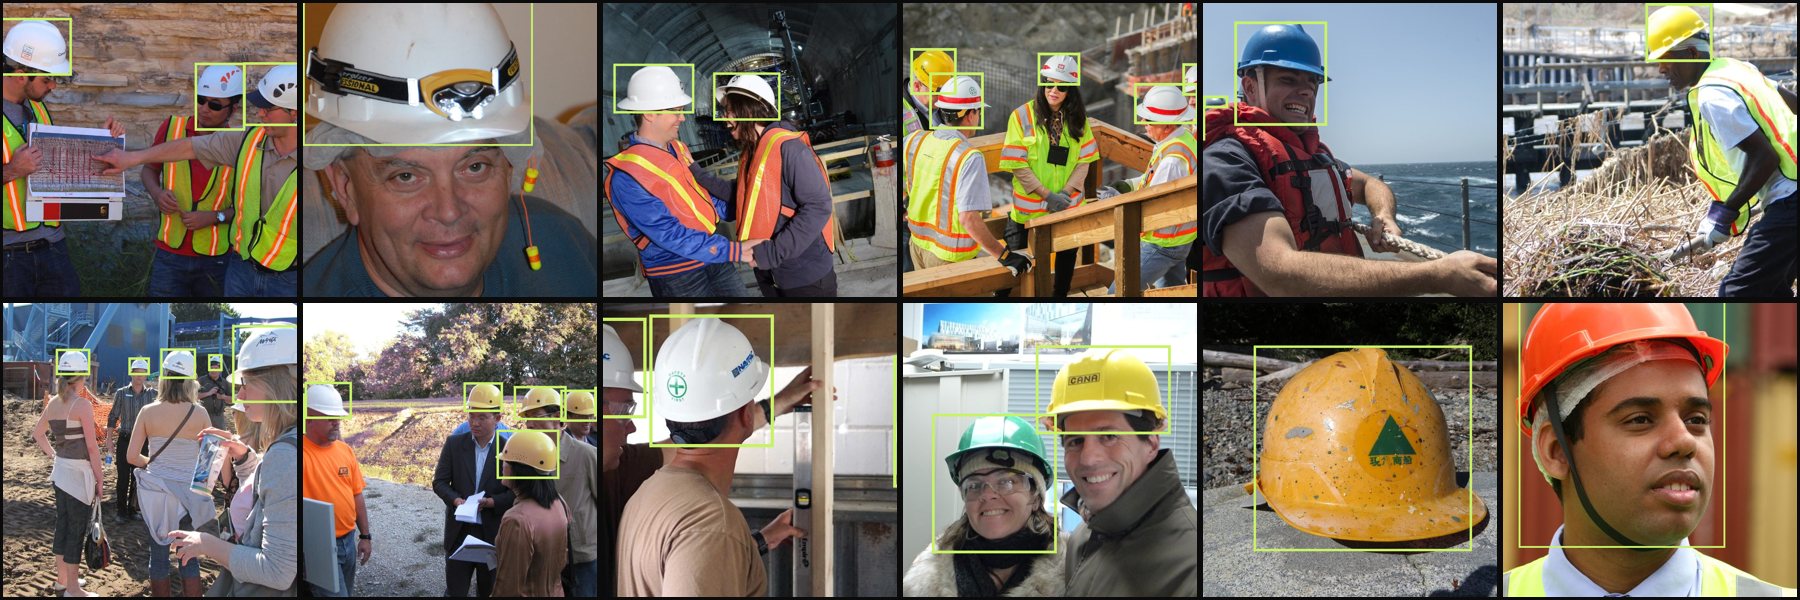
It is one zip of about 9 MB. Leave it zipped. Inside are 100 photos of people wearing hard hats, with a box already drawn around each hat (265 boxes), and a credits file naming every photographer.
Where the photos come from
They are from Open Images.
Each photo is licensed by its photographer under
Creative Commons Attribution 2.0,
and the boxes are from the Open Images annotations by Google LLC, under
Creative Commons Attribution 4.0.
CREDITS.md inside the zip lists every photo, its photographer and a link
to the original. If you pass the set on, pass that file on with it.
4. Train
Open Models in the project's sidebar and choose Upload dataset & train.
- Model name:
hard-hat-detector. - Under Or select one dataset zip manually, pick the zip you downloaded.
- Choose Upload and Start Training.
The panel closes when the upload is done, and the model appears on the Models page with its place in the queue.
5. Watch the run
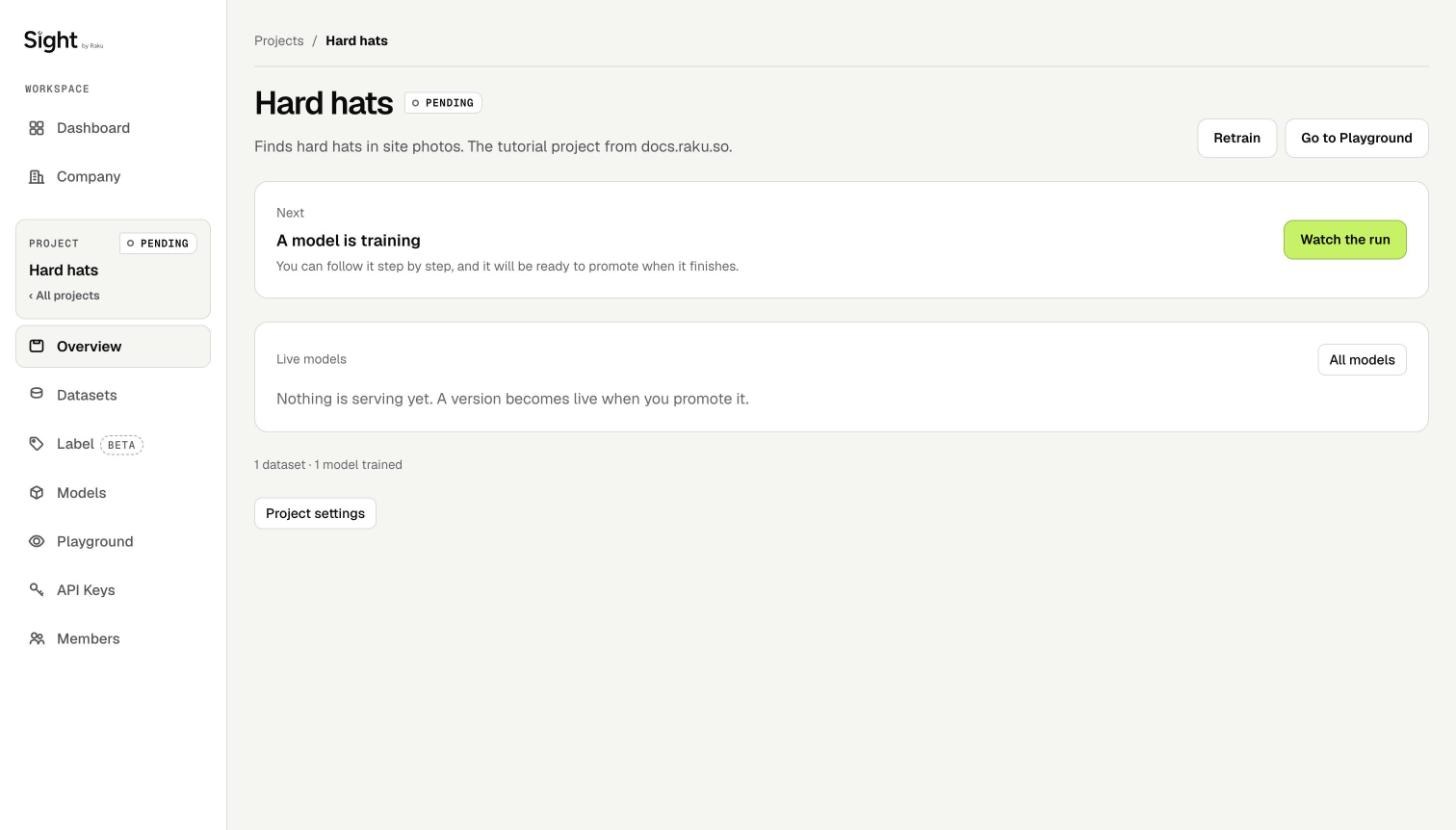
Training happens on our machines, so you can close the tab and come back. The project's Overview says A model is training; choose Watch the run to follow it step by step.
Before it starts learning, Sight sets aside some of the photos (25 of this set's 100). The model never sees those: they are kept back to score it.
When we ran this tutorial, the run waited its turn for a while and then took 11 minutes of GPU time. Yours may wait longer or shorter depending on who else is training.
6. Read the score
When the run finishes, open Models and choose 1 version on the model. The version shows its score: how well it did on the photos that were kept back, from 0 to 1. That number is the honest one, because those photos were not used to teach it.
Ours scored 0.84. Yours should land close to that, since it is the same photos and the same split. A hundred photos is a small set, so it is a good start, not a finished model: to raise the score you add more photos, especially of the cases it gets wrong, and train again.
There is nothing to start: on a free account the model runs on a shared machine as soon as it has trained, ready to try.
7. Label photos yourself
The sample set arrived with its boxes drawn. With your own photos, you draw them. Open Label and choose Add photos, then pick a few photos from your computer.
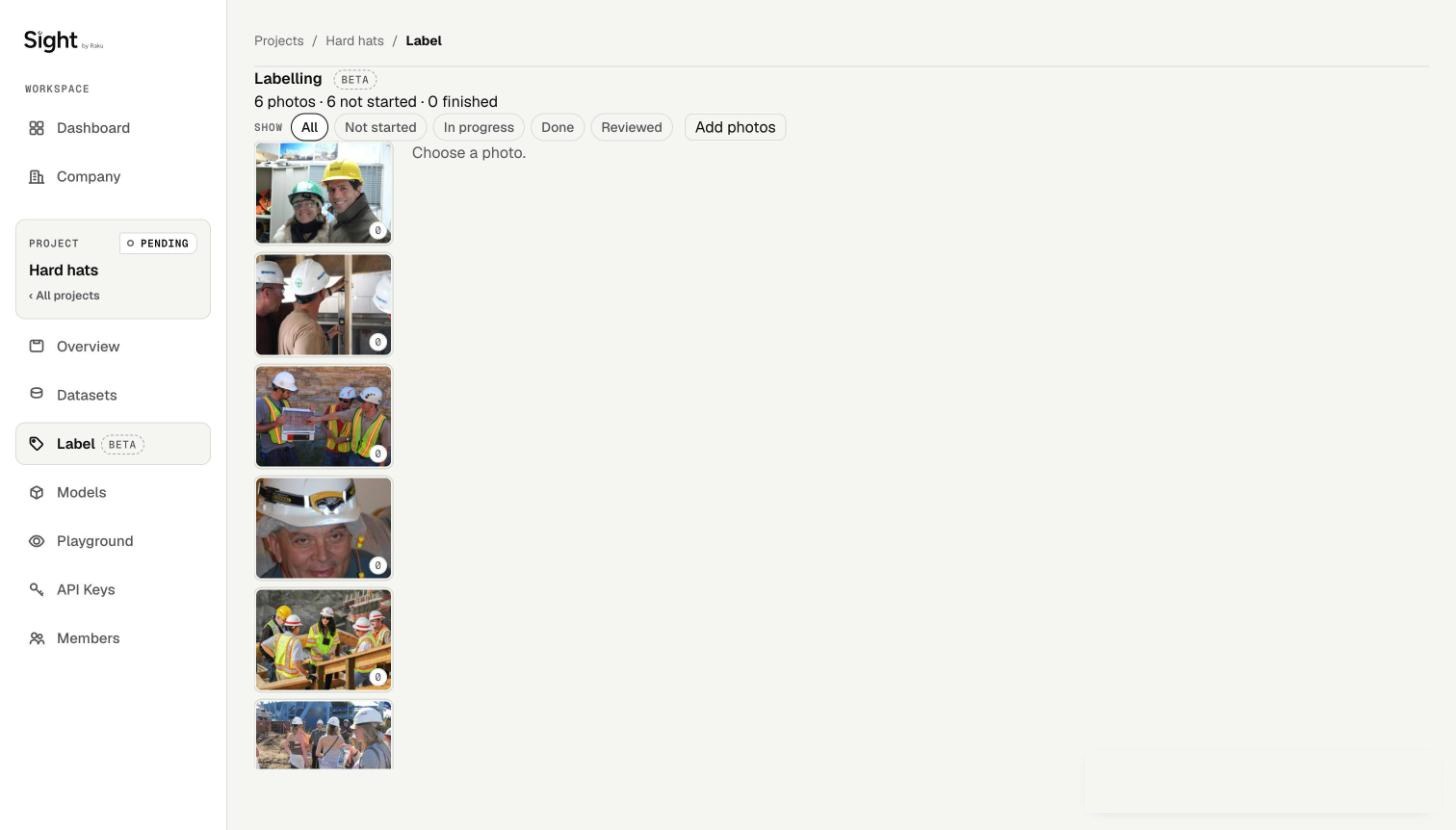
- Click a photo to open it.
- Choose + class and name what you are looking for, such as
hard_hat. It appears as a chip above the photo. - Click the chip, press R for the box tool, and drag a box around each one you can see. Everything saves as you go.
- Choose Mark done when the photo is finished.
Only photos marked done count as labelled. The tools and keys are all in Labelling.
See the sample set's boxes
Choose Import a dataset on the labelling screen and pick the sample set you uploaded. It shows what is inside first (100 photos, 1 class, 265 boxes), then brings the photos in with their boxes, ready to look at or correct.
8. Train on what you labelled
A project holds three things: its photos, the labelled datasets saved from them, and the models trained on those.
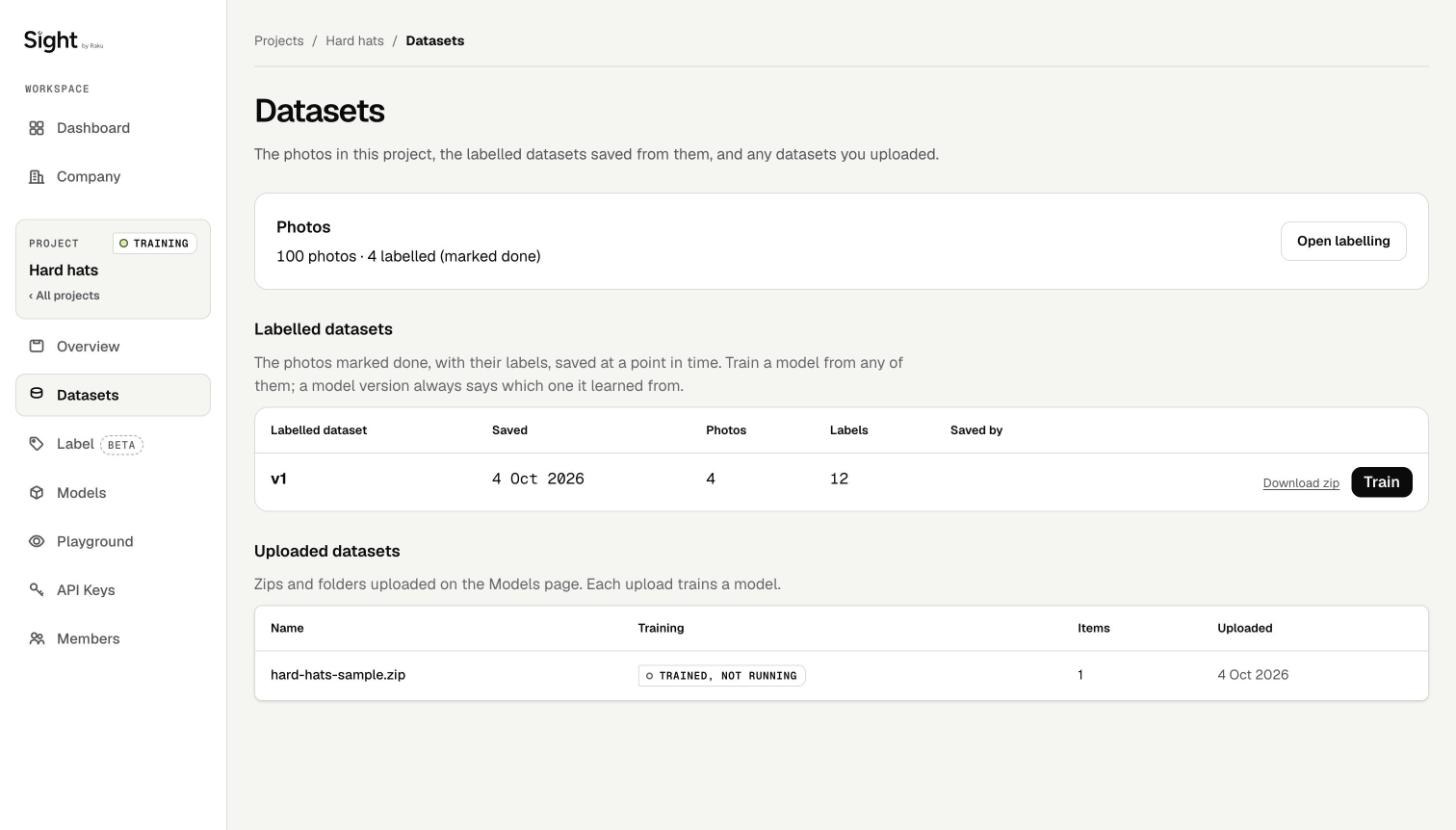
- On the labelling screen choose Save labelled dataset. It says how many photos and labels go in, and how many are kept back to score the model, then saves them as v1. Carry on labelling afterwards and v1 does not change; the next one you save is v2.
-
Open Datasets. Your labelled dataset is listed with its date and counts. Choose Train beside it.
-
Pick a new model and name it, or a new version of a model you already have, then Start training.
-
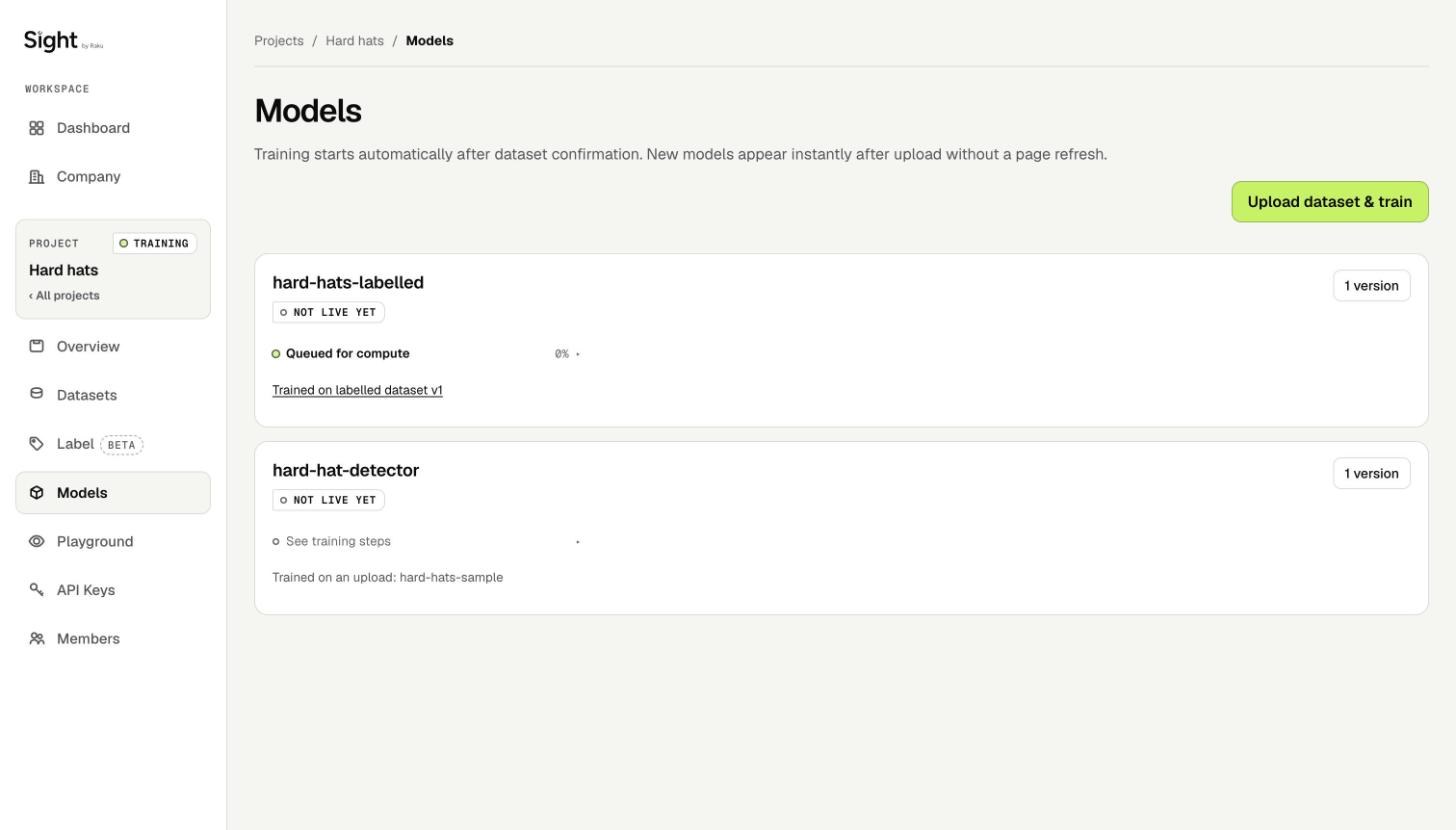
Follow it on Models. The run shows its place in the queue, then its progress, and the version says Trained on labelled dataset v1, so you can always tell what a model learned from.
In a hurry? Train on these labels on the labelling screen does steps 1 to 3 in one go.
A run needs at least two photos marked done, because one is kept back to score the model. A handful of photos proves the loop works; a model worth using needs many more.
9. Try a photo
Open Playground, choose the model you trained, add a photo with hard hats in it and choose Run inference. The boxes the model found are drawn on the photo, and each one is listed with how sure the model is.
Each photo counts towards the month's allowance. The Playground shows how many are left and when they start again.
10. Write a rule and read the verdict
A model says what it sees. A rule says what that means.
- In Playground, under Rules, choose the kind Must be there, keep
At least at 1, and choose
hard_hat. Name it, for example "Hard hats on site", choose Add rule, then Save rules. - Run a photo again. Next to the detections, Verdict says Pass, Fail or Needs a person, with the reason for each rule, such as "Needs at least 1 hard_hat: 2 seen."
The four kinds of rule:
| Kind | Reads as |
|---|---|
| Must be there | at least 2 hard_hat |
| Must not be there | no open_trench |
| Count | exactly 3 person, or at most 6 person |
| Goes with | every person has a hard_hat |
Goes with needs a model that knows both things, such as person and
hard_hat. The sample set has only hard_hat, so label people too and train
again to try it.
Rules can only be written about things the model has learned to find. When a detection is borderline, the verdict is Needs a person rather than a guess.
Where to go next
- Call the model from your own software. API Keys has the model's key; the same 1,000 photos a month cover the Playground and the API. For more, or for a machine of your own, talk to us about a plan.
- Check whole jobs, not single photos. Photo checks turn a model into pass, fail or needs a person, with the reason.
- Building it into your product? Start with the Quick start, or hand the setup to a coding agent: For AI agents.